Class Tutorial 02 : Fragments, NavigationComponent, RecyclerView
Before you get started:
Make sure to have completed:
Step-By-Step
NOTE: depending on the version of Android Studio, your screens might vary and you might need to take fewer steps.
Step 1
Create a new Empty Views Activity project.
Step 2
Add Navigation to the project. A simple way of doing this is to simply add a new XML resource with ‘Navigation’ at the root. Right-click on /res and select Android Resource File. You will be prompted to add the necessary dependencies. See below:

You may see a dialog like this:

This is saying that libraries need to be added to the project. Click OK to allow these to be added automatically.
NOTE:
In some cases you may try to build and get an error saying the navigation libraries require API version 34 to build. If you see this message, go into the build.gradle (app) file and change the version number for the navigation libraries to 2.5.3:
implementation("androidx.navigation:navigation-fragment-ktx:2.5.3")
implementation("androidx.navigation:navigation-ui-ktx:2.5.3")
Step 3
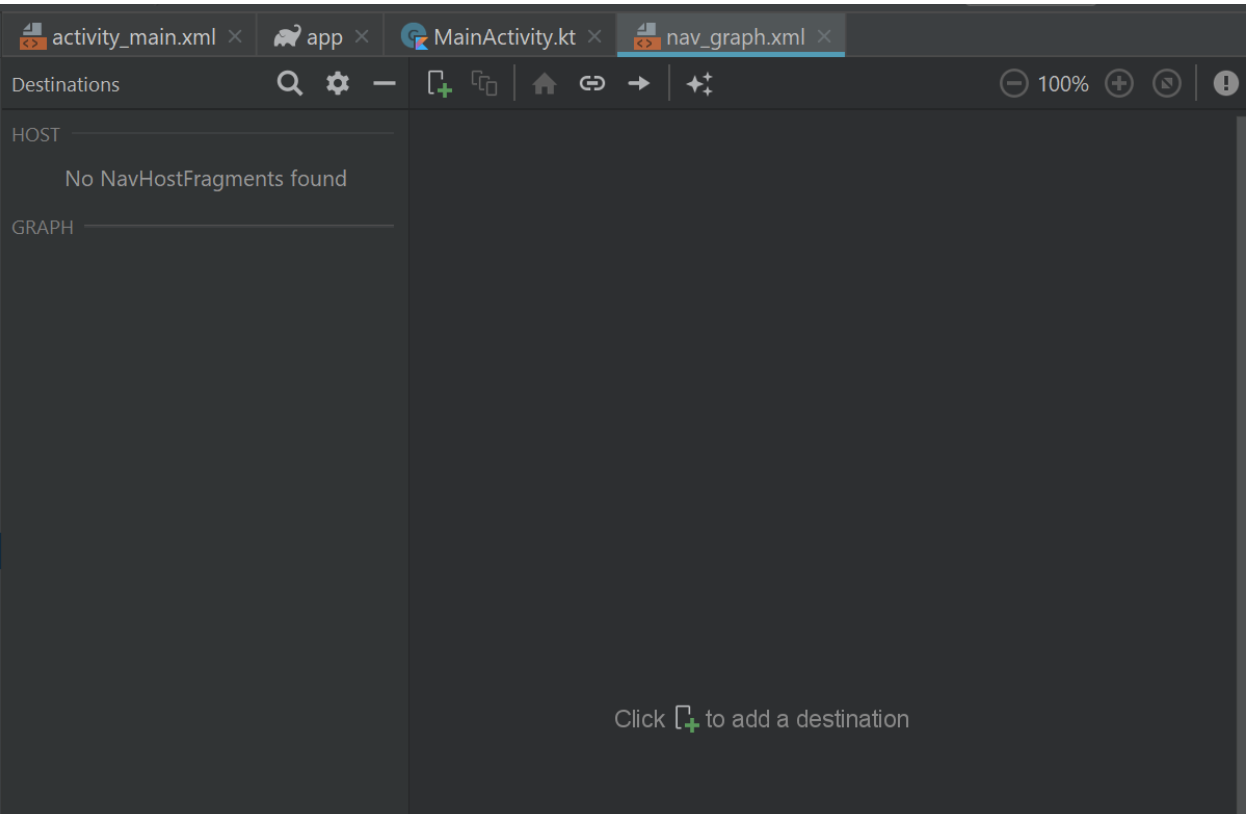
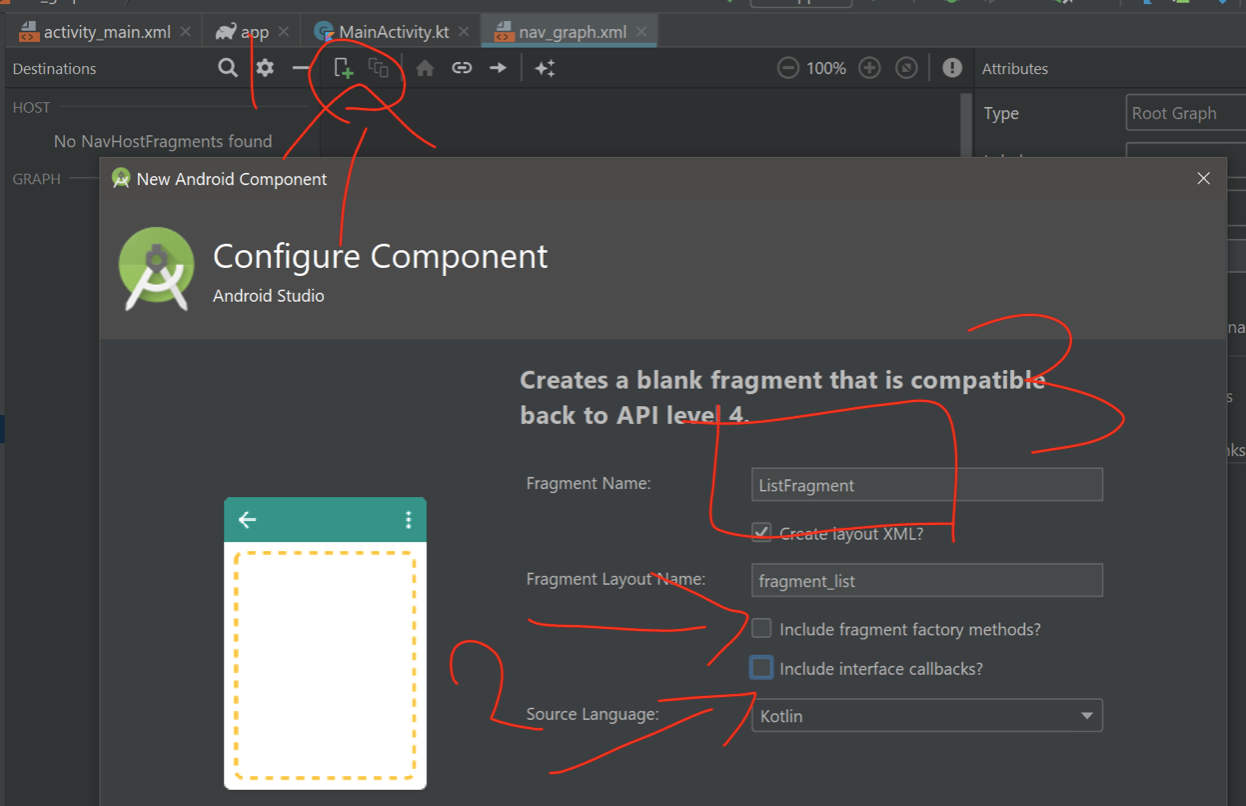
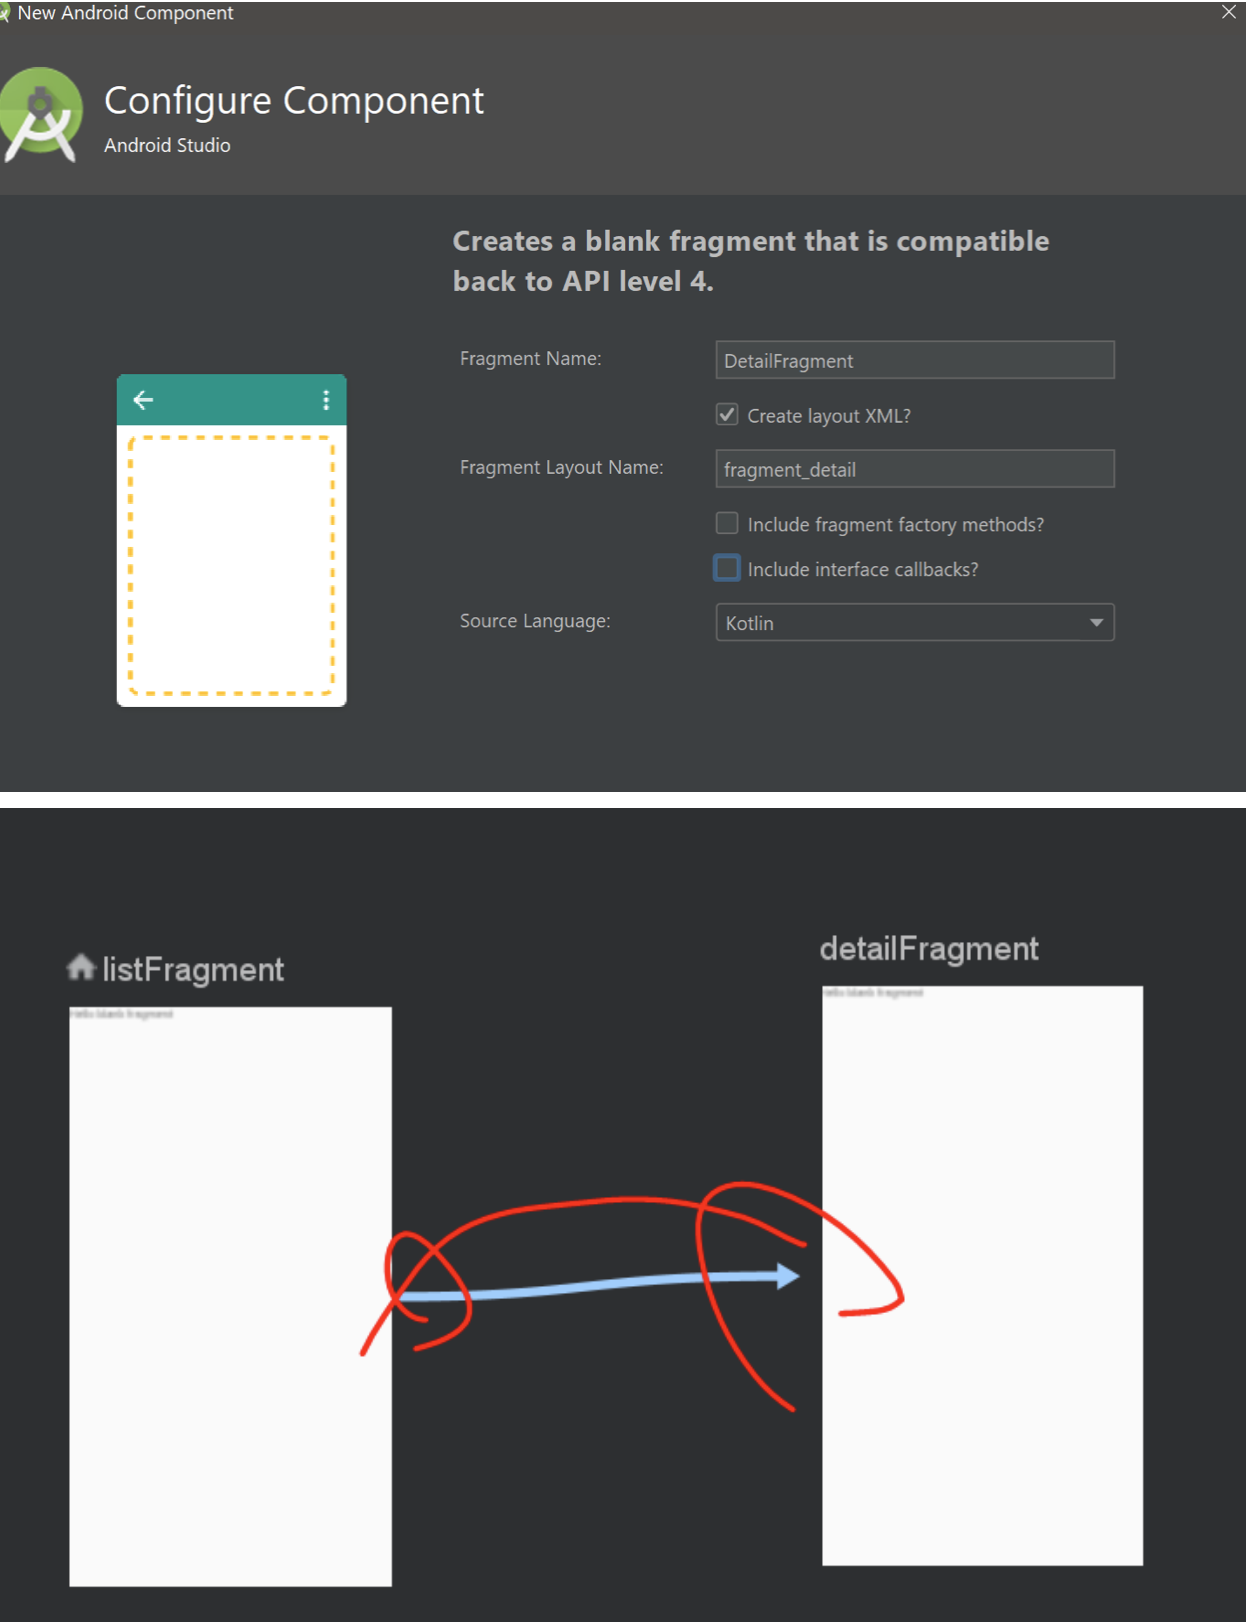
Inside the newly created Navigation component (nav_graph.xml) add three destinations (DetailFragment, ListFragment and WikiFragment) and connect them via action arrows. See below:

Step 4
Now that you have all of the fragments (‘destinations’) interconnected it is time to actually build these fragments. Add the following to /res/values/strings.xml (content taken from Wikipedia will be previewed inside ListFragment):
   <string name="CS">Al-Khwarizmi popularizing treatise on algebra (The Compendious Book on Calculation by Completion
       and Balancing, c. 813–833 CE[9]:171) presented the first systematic solution of linear and quadratic equations.
       One of his principal achievements in algebra was his demonstration of how to solve quadratic equations by
       completing the square, for which he provided geometric justifications.[8]:14 Because he was the first to treat
       algebra as an independent discipline and introduced the methods of "reduction" and "balancing" (the
       transposition of subtracted terms to the other side of an equation, that is, the cancellation of like terms on
       opposite sides of the equation),[10] he has been described as the father[11][12] or founder[13][14] of algebra.
   </string>
   <string name="ECE">"Attempting to develop inventions he could patent and market, Tesla conducted a range of
       experiments with mechanical oscillators/generators, electrical discharge tubes, and early X-ray imaging. He also
       built a wireless-controlled boat, one of the first ever exhibited. Tesla became well known as an inventor and
       would demonstrate his achievements to celebrities and wealthy patrons at his lab, and was noted for his
       showmanship at public lectures. Throughout the 1890s, Tesla pursued his ideas for wireless lighting and
       worldwide wireless electric power distribution in his high-voltage, high-frequency power experiments in New York
       and Colorado Springs. In 1893, he made pronouncements on the possibility of wireless communication with his
       devices. Tesla tried to put these ideas to practical use in his unfinished Wardenclyffe Tower project, an
       intercontinental wireless communication and power transmitter, but ran out of funding before he could complete
       it.[7]
   </string>
   <string name="MATH">In Principia, Newton formulated the laws of motion and universal gravitation that formed the
       dominant scientific viewpoint until it was superseded by the theory of relativity. Newton used his mathematical
       description of gravity to prove Kepler laws of planetary motion, account for tides, the trajectories of comets,
       the precession of the equinoxes and other phenomena, eradicating doubt about the Solar System heliocentricity.
       He demonstrated that the motion of objects on Earth and celestial bodies could be accounted for by the same
       principles. Newton inference that the Earth is an oblate spheroid was later confirmed by the geodetic
       measurements of Maupertuis, La Condamine, and others, convincing most European scientists of the superiority of
       Newtonian mechanics over earlier systems.
   </string>
   <string name="STAT">Gertrude Mary Cox (January 13, 1900 – October 17, 1978) was an American statistician and founder
       of the department of Experimental Statistics at North Carolina State University. She was later appointed
       director of both the Institute of Statistics of the Consolidated University of North Carolina and the Statistics
       Research Division of North Carolina State University. Her most important and influential research dealt with
       experimental design; she wrote an important book on the subject with W. G. Cochran. In 1949 Cox became the first
       female elected into the International Statistical Institute and in 1956 was President of the American
       Statistical Association.
   </string>
   <string name="PHYS">Newton built the first practical reflecting telescope and developed a sophisticated theory of
       colour based on the observation that a prism separates white light into the colours of the visible spectrum. His
       work on light was collected in his highly influential book Opticks, published in 1704. He also formulated an
       empirical law of cooling, made the first theoretical calculation of the speed of sound, and introduced the
       notion of a Newtonian fluid. In addition to his work on calculus, as a mathematician Newton contributed to the
       study of power series, generalised the binomial theorem to non-integer exponents, developed a method for
       approximating the roots of a function, and classified most of the cubic plane curves.
   </string>

   <string name="CSurl">https://en.wikipedia.org/wiki/Muhammad_ibn_Musa_al-Khwarizmi</string>
   <string name="PHYSurl">https://en.wikipedia.org/wiki/Isaac_Newton</string>
   <string name="STATurl">https://en.wikipedia.org/wiki/Gertrude_Mary_Cox</string>
   <string name="MATHurl">https://en.wikipedia.org/wiki/Isaac_Newton</string>
   <string name="ECEurl">https://en.wikipedia.org/wiki/Nikola_Tesla</string>
Step 5
Define NewsItem data class in a separate file (this will be used to represent news items related to various disciplines):

    //that's it!, in kotlin you don’t need to create setter and getter methods for simple data classes

    data class NewsItem (var dept: String,var color: Int,var content: String )
Step 6
Each NewsItem object will need to be represented inside a RecyclerView; You will need to define how this is going to happen.
Add a new layout file to res/layout called recyclerviewitem.xml. It will look like this:

<?xml version="1.0" encoding="utf-8"?>
<androidx.constraintlayout.widget.ConstraintLayout
    xmlns:android="http://schemas.android.com/apk/res/android"
    xmlns:app="http://schemas.android.com/apk/res-auto"
    android:layout_width="match_parent"
    android:layout_height="wrap_content">

   <ImageView
           android:layout_width="wrap_content"
           android:layout_height="wrap_content"
           app:srcCompat="@android:drawable/star_big_on"
           android:id="@+id/imageView"
           app:layout_constraintTop_toTopOf="parent"
           app:layout_constraintStart_toStartOf="parent"
           app:layout_constraintEnd_toStartOf="@+id/dept"
           app:layout_constraintBottom_toBottomOf="parent"/>
   <TextView
           android:text="TextView"
           android:layout_width="wrap_content"
           android:layout_height="0dp"
           android:id="@+id/dept"
           app:layout_constraintStart_toEndOf="@+id/imageView"
           app:layout_constraintTop_toTopOf="parent"
           android:textAppearance="@style/TextAppearance.AppCompat.Large"
           app:layout_constraintBottom_toBottomOf="parent"
           android:layout_marginStart="8dp"
           app:layout_constraintEnd_toStartOf="@+id/news"/>
   <TextView
           android:text="TextView"
           android:layout_width="0dp"
           android:layout_height="wrap_content"
           android:id="@+id/news"
           app:layout_constraintStart_toEndOf="@+id/dept"
           app:layout_constraintTop_toTopOf="parent"
           app:layout_constraintEnd_toEndOf="parent"
           android:layout_marginStart="8dp"
           app:layout_constraintBottom_toBottomOf="parent"/>
</androidx.constraintlayout.widget.ConstraintLayout>
NOTE: Make sure that the resource Ids match the ones above (should you choose to make your own layout).
Step 7
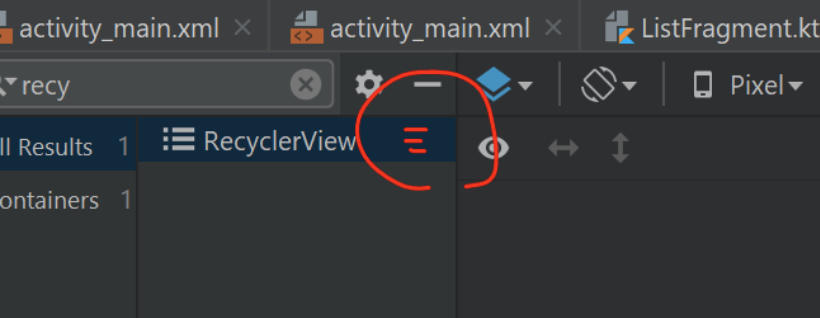
Time to add a RecyclerView to ListFragment’s layout. A simple way of doing this is to search for RecyclerView like shown below:

…then drag it to the layout (in my case I used FrameLayout):
<?xml version="1.0" encoding="utf-8"?>
<FrameLayout xmlns:android="http://schemas.android.com/apk/res/android"
            xmlns:tools="http://schemas.android.com/tools"
            android:layout_width="match_parent"
            android:layout_height="match_parent"
            tools:context=".ListFragment">


   <androidx.recyclerview.widget.RecyclerView
           android:id="@+id/recycler_view"
           android:layout_width="match_parent"
           android:layout_height="match_parent"/>
</FrameLayout>
NOTE:
Depending on the version of Android Studio you are using, you may need to add the necessary dependencies first. In the latest version of Android Studio you do not need to take this step! You will see a little indicator after the search if that is the case. Click it to download the needed package(s):
Step 8
Let’s switch to the Kotlin side of things. Open ListFragment.kt and add the following (outside fragments own class):
class RecyclerViewAdapter(private val myDataset: ArrayList<NewsItem>, private val activity: MainActivity) :
   RecyclerView.Adapter<RecyclerViewAdapter.ViewHolder>() {


   override fun onCreateViewHolder(parent: ViewGroup,
                                   viewType: Int): RecyclerViewAdapter.ViewHolder {
       val v = LayoutInflater.from(parent.context)
           .inflate(R.layout.recyclerviewitem, parent, false)
       return ViewHolder(v, activity)
   }
   override fun onBindViewHolder(holder: ViewHolder, position: Int) {
   }

   // Return the size of your dataset (invoked by the layout manager)
   override fun getItemCount() = myDataset.size
}
Notice that inside onCreateViewHolder you are inflating the layout that you defined for the departmental news items. Also notice that it returns ViewHolder objects created via a constructor that takes two parameters (view and activity). In the next step you will need to connect the data with the views inside each item’s layout.
Step 9
The adapter class will call onBindViewHolder for each item in the data set and allow corresponding ViewHolder objects to accept the matching data items (as specified by position) and update their layouts. A clean way of passing data to ViewHolder is to define a class and a method inside (it will accept the data). Add the following inside RecyclerViewAdapter:
class ViewHolder(private val view: View, private val activity: MainActivity) : RecyclerView.ViewHolder(view){
    fun bindItems(newsItem: NewsItem) {
        //here you will extract info from newsItem and add it to the views
        ///inside the layout
    }
}
Step 10
Call bindItems from inside onBindViewHolder in order to pass data:
override fun onBindViewHolder(holder: ViewHolder, position: Int) {
   holder.bindItems(myDataset[position])
}
Step 11
Back to bindItems inside ViewHolder – extract info from each passed newsItem and updated the views:
fun bindItems(newsItem: NewsItem) {
   val dept: TextView = itemView.findViewById(R.id.dept)
   val news: TextView = itemView.findViewById(R.id.news)
   itemView.setBackgroundColor(newsItem.color)


   dept.text = newsItem.dept
   news.text = newsItem.content.substring(0,50)

   itemView.setOnClickListener {
      //todo: what happens when the item is pressed
   }
}
Step 12
You are done with the RecyclerViewAdapter class (for now). Now we will extract the data from strings.xml and pass it to the RecyclerView:
class ListFragment : Fragment() {

   private lateinit var recyclerView: RecyclerView
   private lateinit var viewAdapter: RecyclerView.Adapter<*>
   private val newsItems = ArrayList<NewsItem>()


   override fun onCreateView(
       inflater: LayoutInflater, container: ViewGroup?,
       savedInstanceState: Bundle?
   ): View? {
       initArray(newsItems)

       var view = inflater.inflate(R.layout.fragment_list, container, false)

       recyclerView = view.findViewById(R.id.recycler_view)

       // This tells the recyclerview that we want to show our data items in a vertical list. We could do a horizontal list,
       // a grid or even something custom in order to display the data items.
       // Make sure to import androidx.recyclerview.widget.LinearLayoutManager

       recyclerView.layoutManager = LinearLayoutManager(context, RecyclerView.VERTICAL, false)

       viewAdapter = RecyclerViewAdapter(newsItems, activity as MainActivity)

       recyclerView.adapter = viewAdapter

       return view
   }

   private fun initArray(myDataset: MutableList<NewsItem>){
       myDataset.clear()

       myDataset.add(NewsItem("CS", Color.GRAY, getString(R.string.CS)))
       myDataset.add(NewsItem("ECE",Color.YELLOW,getString(R.string.ECE)))
       myDataset.add(NewsItem("MATH",Color.WHITE,getString(R.string.MATH)))
       myDataset.add(NewsItem("STAT",Color.MAGENTA, getString(R.string.STAT)))
       myDataset.add(NewsItem("PHYS",Color.RED,getString(R.string.PHYS)))

   }
}
Step 13
Time to see if our list works. Inside MainActivity’s layout you need to add a NavHostFragment. This is a mechanism that allows the navigator component to display its fragments (think of this as if it’s a portal into nav_graph.xml’s destinations). Open activity_main.xml, search for NavHostFragment then drag inside the layout (you might be asked if it is ok to download some dependencies → say ‘yes’):
<?xml version="1.0" encoding="utf-8"?>
<androidx.constraintlayout.widget.ConstraintLayout
       xmlns:android="http://schemas.android.com/apk/res/android"
       xmlns:tools="http://schemas.android.com/tools"
       xmlns:app="http://schemas.android.com/apk/res-auto"
       android:layout_width="match_parent"
       android:layout_height="match_parent"
       tools:context=".MainActivity">
   <fragment
       android:name="androidx.navigation.fragment.NavHostFragment"
       android:layout_width="0dp"
       android:layout_height="0dp"
       app:navGraph="@navigation/nav_graph"
       app:defaultNavHost="true"
       android:id="@+id/fragment"
       app:layout_constraintTop_toTopOf="parent"
       app:layout_constraintStart_toStartOf="parent"
       app:layout_constraintEnd_toEndOf="parent"
       app:layout_constraintBottom_toBottomOf="parent"/>
</androidx.constraintlayout.widget.ConstraintLayout>
Run the app see if it looks like this:

Step 14
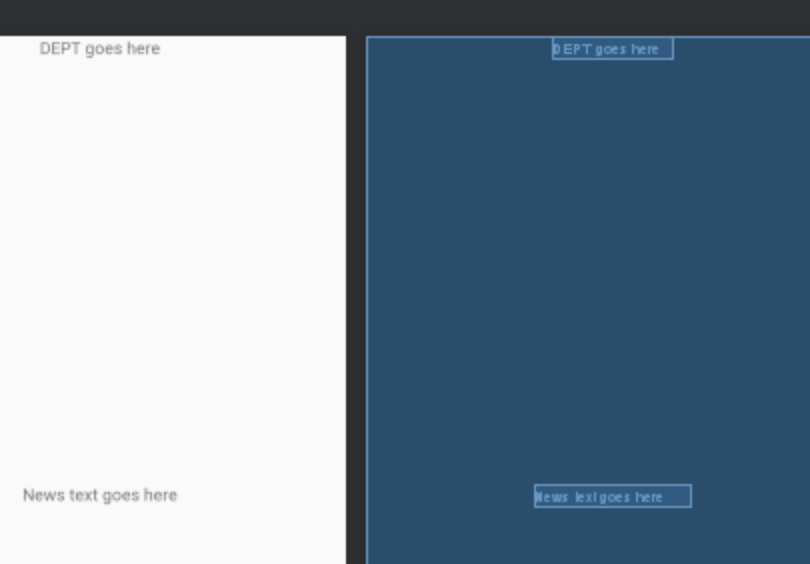
Time to build DetailFragment and use it to display more detailed news. Modify the layout such that it shows two TextViews:
<?xml version="1.0" encoding="utf-8"?>
<androidx.constraintlayout.widget.ConstraintLayout xmlns:android="http://schemas.android.com/apk/res/android"
                                                  xmlns:app="http://schemas.android.com/apk/res-auto"
                                                  android:layout_width="match_parent"
                                                  android:layout_height="match_parent">

   <TextView
           android:layout_width="wrap_content"
           android:layout_height="wrap_content"
           android:id="@+id/dept"
           android:text="DEPT goes here"
           app:layout_constraintTop_toTopOf="parent"
           app:layout_constraintStart_toStartOf="parent"
           app:layout_constraintEnd_toEndOf="parent"/>
   <TextView
           android:layout_width="wrap_content"
           android:layout_height="wrap_content"
           android:id="@+id/news"
           android:text="News text goes here"
           app:layout_constraintStart_toStartOf="parent"
           app:layout_constraintEnd_toEndOf="parent"
           app:layout_constraintBottom_toBottomOf="parent"
           android:layout_marginTop="16dp"
           app:layout_constraintTop_toBottomOf="@+id/dept"/>

</androidx.constraintlayout.widget.ConstraintLayout>
Step 15
Go back to ListFragment’s kotlin code make the recycler view items ‘tappable’ in order to identify the user selection and pass the data to DetailFragment. Add the following inside itemView.setOnClickListener in the ViewHolder class:
itemView.setOnClickListener {

 view.findNavController().navigate(R.id.action_listFragment_to_detailFragment,
            bundleOf("dept" to newsItem.dept, "news" to newsItem.content))
}
NOTE
In case Android Studio complains about view.findNavController then make sure that you have the following dependencies in the app gradle (NOTE: in the latest version of Android Studio this should not be an issue):
dependencies {
   implementation fileTree(dir: 'libs', include: ['*.jar'])
   implementation "org.jetbrains.kotlin:kotlin-stdlib-jdk7:$kotlin_version"

   def nav_version = "1.0.0-alpha11"
   implementation "android.arch.navigation:navigation-fragment-ktx:$nav_version" // use -ktx for Kotlin
   implementation "android.arch.navigation:navigation-ui-ktx:$nav_version" // use -ktx for
   implementation 'androidx.appcompat:appcompat:1.1.0-alpha01'
   implementation 'androidx.core:core-ktx:1.1.0-alpha04'
   implementation 'androidx.constraintlayout:constraintlayout:1.1.3'
   implementation 'androidx.legacy:legacy-support-v4:1.0.0'
   testImplementation 'junit:junit:4.12'
   androidTestImplementation 'androidx.test:runner:1.1.2-alpha01'
   androidTestImplementation 'androidx.test.espresso:espresso-core:3.1.2-alpha01'
   implementation 'android.arch.navigation:navigation-fragment:1.0.0-alpha11'
   implementation 'androidx.recyclerview:recyclerview:1.0.0'
}
Step 16
Modify DetailFragment to receive and display the data:
class DetailFragment : Fragment() {

   //current dept
   var dept:String? = null
   var news:String? = null

   override fun onCreateView(
       inflater: LayoutInflater, container: ViewGroup?,
       bundle: Bundle?
   ): View? {
       return inflater.inflate(R.layout.fragment_detail, container, false)

   }

   override fun onViewCreated(view: View, bundle: Bundle?) {
       super.onViewCreated(view, bundle)
       dept = this.arguments?.getString("dept")
       news =  this.arguments?.getString("news")


       (view.findViewById(R.id.dept) as TextView).text = dept
       (view.findViewById(R.id.news) as TextView).text = news

   }

}
Run the app select ‘CS’ from the list. You should see this:

Step 17
Make the text inside DetailFragment tappable. Once tapped it should open WikiFragment that will display the Wikipedia page with more details. Add to onViewCreated:
val resId = resources.getIdentifier(dept + "url", "string", context?.packageName)
//opens WikiFragment with webview
(view.findViewById(R.id.news) as TextView).setOnClickListener(object: View.OnClickListener{
override fun onClick(v: View?) {
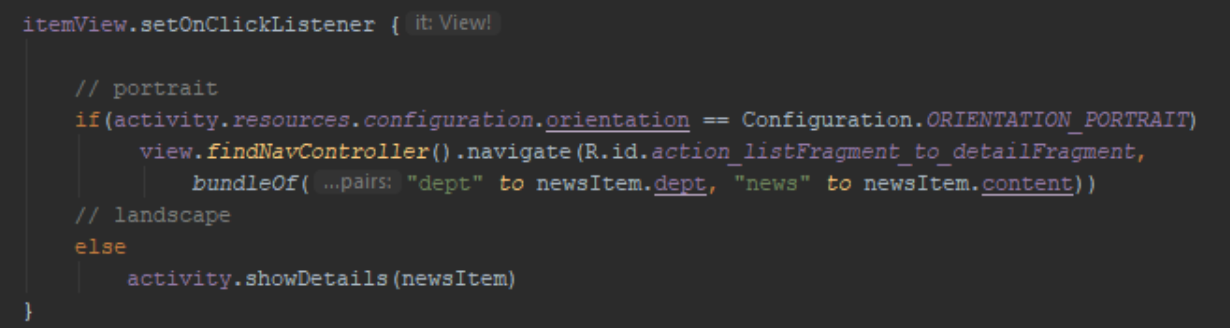
if(resources.configuration.orientation == Configuration.ORIENTATION_PORTRAIT)
v?.findNavController()?.navigate(R.id.action_detailFragment_to_wikiFragment,
bundleOf("url" to resources.getString(resId))
)
}
})
Step 18
Add WebView inside WikiFragment and make display the Wikipedia page selected from DetailFragment. Layout (fragment_wiki.xml):
<?xml version="1.0" encoding="utf-8"?>
<FrameLayout xmlns:android="http://schemas.android.com/apk/res/android"
            xmlns:tools="http://schemas.android.com/tools"
            android:layout_width="match_parent"
            android:layout_height="match_parent"
            tools:context=".WikiFragment">
   <WebView
           android:layout_width="match_parent"
           android:layout_height="match_parent"
           android:id="@+id/wikipedia"/>
</FrameLayout>
Kotlin inside WikiFragment.kt:
class WikiFragment : Fragment() {

   override fun onCreateView(
       inflater: LayoutInflater, container: ViewGroup?,
       savedInstanceState: Bundle?
   ): View? {


       val view =  inflater.inflate(R.layout.fragment_wiki, container, false)

       val webView =  (view.findViewById(R.id.wikipedia) as WebView)
       webView.webViewClient = WebViewClient()
       this.arguments?.getString("url")?.let { webView.loadUrl(it) }
       return view
   }
}
Step 19
Run the app and test it. Try running it on the actual phone because the emulator is probably not configured to connect to the web. If you don’t have a physical device, configure your emulator for the internet
One alternative is to add the <uses-permission android:name="android.permission.INTERNET"/> directive to the /app/manifests/AndroidManifest.xml file, just above the start of the <application> object:
<?xml version="1.0" encoding="utf-8"?>
<manifest xmlns:android="http://schemas.android.com/apk/res/android"
    xmlns:tools="http://schemas.android.com/tools"
    package="com.example.t02">
    <uses-permission android:name="android.permission.INTERNET"/>
    <application
        .
        .
        .
Step 20
If haven’t done already, convert the app to use view binding
Step 21
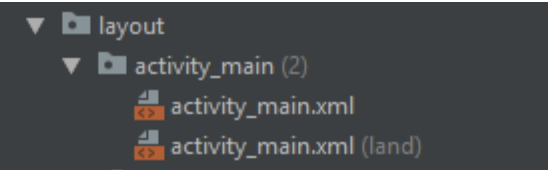
Challenge: make a landscape version of the app that divides the screen in half and shows both ListFragment and DetailFragment (ignore WikiFragment):